• Home
  • About
  • Recipe Index
  • Subscribe

Get Natured

I have been doing a lot of running lately. More than usual because I am training for a St. Patrick's Day half marathon. My long run days are now 8-10 mile runs and, for that distance, I sometimes need a little energy boost in the middle. I have used gel packets (like this) in the past but I get burned out on those really quickly and I'm ready for something new.

For the past few long runs I have been carrying a little ziploc bag of dates in my SPIbelt (yes, I am a hippie freak), but I really wanted to try a new combination of flavors. I am a HUGE fan of lemon desserts and coconut too. Because they are mostly dates and cashews, these balls are similar to Larabars but the flavor is even better! They are so, so good!

IMG_8940.JPG

Did you know…? Dates contain glucose which makes them a great food for quick energy. Read more here.

IMG_8928.JPG

Lemon Coconut Energy Balls
Makes about 7 1-inch balls

1/3 cup chopped pitted dates
1/2 cup raw cashews
1/4 cup coconut flakes (the big crunchy ones work great!)
1 teaspoon lemon zest
1/2 teaspoon vanilla extract
A small pinch of salt

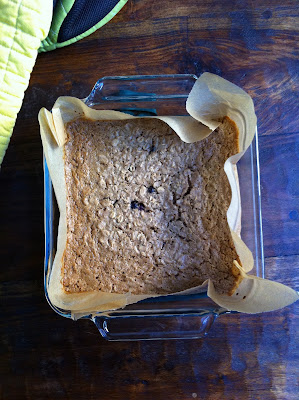
  1. Place chopped dates in the food processor and process until they start to stick together and form a ball. Remove the ball of dates and place in a small bowl. Set aside.
  2. Put remaining ingredients into the food processor and process until nuts are finely chopped. Add the dates and process again until the mixture is starting to clump and stick together. Remove from the food processor and press it together firmly with your hands to form one big ball. Break off pieces and roll into about 7 1-inch balls. Keep in a covered container in the fridge.
Variation: Use lime zest instead of lemon for Key Lime Coconut Energy Balls!

IMG_8932.JPG


Share
Tweet
Pin
Share
5 comments
Making popcorn that doesn't come from the microwave is not supposed to be hard. The other day I put a little coconut oil in my stovetop popper and started to make popcorn like I always do. The oil, instead of just getting hot and popping the corn, started smoking like crazy and burned the corn kernels to a crisp. I do not know why. Maybe my coconut oil (a brand I don't normally buy) had more coconut meat in it than usual? I don't know.

After melting a hole through the garbage bag in my kitchen, I ran around the house turning on fans and opening doors and windows to get the smoke out. The house filled up with burnt popcorn smoke and, subsequently, mosquitoes that came in through the open doors. This is not how making popcorn usually goes!

In my desperation to avoid a second smoke bomb, I Googled "pop regular popcorn in the microwave" and learned how ridiculously easy it is to do! No more cleaning the popcorn popper, no more using oil to pop the corn, no more kitchen smoke bombs. No more kids running around the house yelling, "mosquitoooo!!!" PERFECT!

By now we all know that store-bought microwave popcorn is toxic. You know that, right? Even Oprah knows. Please don't eat that stuff! We also know that air-popped is the way to go to avoid excess fat and calories.

Without the oil, popcorn is actually a decent snack that contains 7g of fiber and 4g protein per 120 calorie serving.

Microwave Air-Popped Popcorn
Start with organic popcorn (to avoid GMO, genetically modified, corn) and follow these simple steps for yummy, air-popped popcorn from the microwave!

1. Pour 1/4-1/3 cup organic popcorn kernels into a brown paper lunch sack.

2. Fold down the top of the bag a few times and crease it with your fingernail or the back of a knife.

3. Place in the microwave and press the popcorn button (or cook on high for about 1 1/2 minutes). The bag will puff up, just like microwave popcorn bags do, and the corn will pop. When the popping slows to a couple of seconds between pops, turn off the microwave.

4. Remove the bag and pour the popcorn into a bowl (be careful, it is hot). Top with nutritional yeast, salt, chipotle chile powder, cinnamon and sugar- whatever you like! Enjoy!
Share
Tweet
Pin
Share
2 comments
I read an article a little while back that claimed that there are two kinds of people: those that thrive on variety and crave novelty, and those that prefer the predictability and comfort of the same routine day after day. While I tend to get bored very easily, I do stick to routines for the more practical parts of life. Like grocery shopping, for example! I know which stores have the items on my list and even where the items are located inside those stores. That saves me time which, with my grocery-store-hating little people in tow, is precious.


When I was asked to create a healthy breakfast recipe for Save Mart Supermarkets, I had to try something new.

I had never been to Save Mart before this week and I was pleasantly surprised to find that the customer service was great and I was able to find all of the ingredients that I needed for the breakfast oatmeal bars that I had dreamed up for this challenge!

For my breakfast recipe, I wanted to create something that could be a grab-and-go breakfast for busy families and something that was easy to make with simple, familiar ingredients. For everyone that says that healthy food is weird or hard to make or contains ingredients that are impossible to find, this is for you! These bars are super healthy, vegan, and gluten free. In spite of all that, though, they are moist and yummy and made from easy-to-find, simple ingredients which can be purchased in any mainstream grocery store (including Save Mart!).


Breakfast Oatmeal Bars
Makes 9 vegan, gluten-free bars

2 cups old-fashioned oats
1/4 cup brown sugar
1/2 teaspoon cinnamon
2 teaspoons baking powder
1/4 teaspoon salt
1 cup non-dairy milk (almond, soy, rice, coconut, etc.)
1 large extra-ripe banana
1 teaspoon vanilla extract
2 tablespoons nut butter (almond, peanut, etc.)
1 teaspoon lemon zest
1/2 cup non-dairy yogurt (soy, almond, coconut, etc.)
1/2 cup blueberries (fresh or frozen)

  1. Preheat oven to 350°F and line an 8x8 pan with parchment paper (or lightly oil the pan). Combine all dry ingredients (oats, sugar, cinnamon, baking powder, and salt) in a medium bowl and set aside.
  2. Put all wet ingredients (milk, banana, vanilla, nut butter, lemon zest, and yogurt) in a blender and blend until smooth.
  3. Pour wet ingredients into dry and stir to combine. Fold in blueberries. Pour batter into the prepared pan, then bake for about 40 minutes or until golden brown and firm. Let cool before cutting into 9 bars.
Share
Tweet
Pin
Share
2 comments
The colors of fall are appearing all over the place where I live. I absolutely love running at sunrise this time of year! The light is golden and it shines through the leaves of red, gold, orange, and brown that line the streets of my neighborhood.

IMG_7869.JPG

Simple beauty first thing in the morning is a great way to start the day!

IMG_7871.JPG

IMG_3652.JPG

IMG_7861.JPG

IMG_7860.jpg

IMG_7866.JPG

IMG_7867.jpg

I love the green heart in the middle of this leaf!

IMG_3662.JPG

To help us get into the fall spirit, the kids and I took a trip to Apple Hill a couple of weeks ago.

IMG_3670.JPG 

We had some treats (apple turnover and apple strudel):

IMG_3664.JPG

Visited some farm animals...

IMG_3667.JPG

...including a "plaid" chicken (in the words of my five year old)...

IMG_3668.JPG

...walked a hay maze...

IMG_3669.JPG

...and came home with a box of apples, pears, squash, cider, and mulling spices:

IMG_3665.JPG

I bought three kinds of apples: Gala (for eating), Fuji (for applesauce), and Granny Smith (for pie or crisp).

IMG_3671.JPG

I used the Fuji apples for this applesauce and they were perfect. I don't usually eat a lot of applesauce but my kids do (one of their favorite breakfasts is oatmeal with applesauce and raisins). This sauce is so good, though, that I added some to my morning oats too.

It tastes just like apple pie- yum!

IMG_7910.JPG

Easy Crockpot Applesauce
Makes about 32oz.

About 10 sweet apples (Gala or Fuji work well), cored chopped (you don't need to peel them)
~1/4 to 1/2 cup water
1/2 cup unsweetened apple juice (or more water)
1 tablespoon ground cinnamon
1 teaspoon vanilla
  1. Place all ingredients in your crockpot and stir to coat apples with cinnamon. Cook on high for several hours (4-ish) until apples are very soft. 
  2. Turn off the crockpot and let apples cool until they are no longer steaming hot. Pour into a blender and blend until smooth. If you prefer a chunkier sauce, mash the apples with a fork or potato masher instead of blending.
IMG_7931.JPG

IMG_7926.JPG
Share
Tweet
Pin
Share
No comments
The weather here has been looking more like January than June. In the spirit of comfort food, I came up with this crockpot version of a vegan polenta lasagna. It is healthy and delicious and I think that trying this recipe with different veggies would be good too. This recipe was inspired by Fat Free Vegan Kitchen.

Polenta*
4 cups water
1 cup polenta
1 tbsp margarine (I used Earth Balance)

  1. Cover a baking sheet with parchment paper and set aside. Bring 4 cups of water to a boil. Slowly add polenta. Add margarine and stir continuously until very thick.
  2. Pour polenta onto prepared baking sheet and spread evenly to about 1/4 inch thick. Set aside to cool.
  3. When cooled, cut into rectangles.
*You may use pre-made polenta to make this even quicker.

Vegan Polenta Lasagna
Olive oil
1 large portobello mushroom, cut into thin 1 inch slices
1/2 bunch of kale, washed and chopped
1/2 large onion, finely chopped
4 cloves of garlic, minced
1 tsp dried basil
Cheese sauce (see below)
Sea salt and pepper to taste
1-2 cups marinara sauce (homemade or in a jar)

  1. Heat 1-2 tbsp of olive oil in a large skillet over medium heat. Add mushrooms and onions and saute until mushrooms start to get juicy. Add the garlic and cook for 1-2 minutes. Add the kale and cook until kale is bright green and starting to soften. Add cheese sauce and cook until it has thickened a bit and is no longer runny. Remove from heat and season with salt and pepper, if necessary.
  2. Cover the bottom of the crockpot with a layer of marinara sauce. Cover marinara sauce with a single layer of polenta slices (homemade or pre-made). Top with a layer of the kale mixture. Repeat layers: marinara sauce, polenta, kale; finishing with a layer of polenta then marinara.
  3. Cover and cook on high heat for about 3-4 hours. Uncover and let stand for 30 minutes before serving.
Cheese Sauce
1 cup unsweetened non-dairy milk (I used almond)
1/3 cup raw cashews
1/4 cup nutritional yeast
2 tbsp soy sauce
1 tbsp lemon juice
2 tsp Dijon mustard
1/2 tsp onion powder
1/2 tsp garlic powder
2 tsp corn starch or arrowroot
1/2 tsp white pepper

  1. Place all ingredients in a blender and blend until very smooth.
Share
Tweet
Pin
Share
3 comments
Amaranth is commonly referred to as a grain, but it is actually a tiny seed with big benefits. It is a great source of calcium, iron, protein, magnesium, zinc, and amino acids. Just 1/4 cup (uncooked) amaranth contains 7 grams of protein, 5 grams of fiber, and 21% of the RDA for iron.

Amaranth can be cooked as a hot cereal, ground into (or purchased as) flour for gluten-free baking, or even popped like popcorn!

I love popped amaranth tossed with salads, over hot cereal, added to baked goods, or in homemade granola bars.

Popping amaranth has a bit of a learning curve. It took me several tries before I found a method that works for me. It may take some experimentation for you as well but, to get you started, here is my method*:

  1. Heat a dry pan on high heat.
  2. Add about a tablespoon of amaranth and quickly move the pan in a circular motion (ala "Jiffy Pop") over the burner. The key here is to keep the pan moving in a circular motion until the amaranth has finished popping so that you don't end up with "snow" all over your kitchen!
*Note: This works well over my gas stove- I'm not sure how it would work over an electric burner.

(Updated from the original post, published May 2009.)
Share
Tweet
Pin
Share
2 comments
It really feels like spring this week. It is in the 70s here (80s tomorrow!). The kids are playing in the backyard without shirts or shoes. The birds are happily tweeting away in the freshly-greened trees. There is a breeze blowing that softly reminds me that winter still has a tiny hold, but the air smells like summer. While I should be gathering laundry and dusting tables, I feel more inclined to sit and soak up the sun. "The dishes can wait," says the slacker in me, "go get your Kindle!"

I have been keeping a close eye on the roadside strawberry stands near my house. They should be open really soon and I can't wait! It is also the beginning of asparagus season. I've been known to eat an entire pound of asparagus myself. It is just that good.

I usually roast it in the oven with a little olive oil and sea salt.

Last night, though, I was ravenous when I got home from triathlon training. Instead of asparagus alone, I wanted something more substantial. These spicy noodles come together really quickly and the recipe makes a ton so you'll have leftovers for another night or for lunches throughout the week. This dish is intended to be eaten cold, like a salad, but it would be fine warm as well.

Spicy Noodles With Asparagus and Broccoli
  • ~15 ounces of soba noodles or whole wheat pasta*
  • 2 cups chopped fresh broccoli
  • 1 bunch of asparagus, cut in bite-sized pieces
  • 1 cup shredded carrots
  • 2 tbsp toasted sesame seeds (lightly toast them in a dry skillet or buy toasted seeds)
  • 1/2 cup green onions, chopped
  • 1/4 low sodium soy sauce*
  • 1 tbsp chili garlic sauce (or other hot sauce or chili flakes, adjust amount based on desired spice level)
  • 1 tbsp rice vinegar
  • 1 tbsp toasted sesame oil
  • 2 tsp aji-mirin (rice wine), optional
  1. Cook the noodles according to the package directions. In the last minute of cooking, add the broccoli and asparagus to the pot. When finished cooking, drain and rinse with cool water to stop the cooking and rinse away the starch that makes the noodles stick together.
  2. In a large bowl, toss the noodle mixture with the carrots, sesame seeds, and green onions.
  3. Make the sauce by whisking together the soy sauce, chili garlic sauce, rice vinegar, sesame oil, and aji-mirin. Pour the sauce over the noodles and toss well. Serve at room temperature or chilled.
*Gluten free: This dish can be made gluten free by substituting rice or other gluten free noodles and using a gluten free tamari (soy sauce). If using full-sodium soy sauce, reduce the amount by 1/4 to 1/2 (down to 2-3 tablespoons).
Share
Tweet
Pin
Share
7 comments
I love the convenience of energy bars but I can't eat any one kind very often because I get burned out on them very quickly. Besides that, they tend to be expensive. These bars are easy to make and they taste great. The ingredients are flexible too, so that really helps to minimize the burn-out factor. Feel free to customize them to your liking! They can easily be made gluten-free too (just make sure that your ingredients are gluten free versions).

Quick and Easy Granola Bars
Makes about 12

  • 1/2 cup slivered or chopped almonds (or other nuts)
  • 1/2 cup sunflower or other seeds
  • 1/2 cup raisins, dried cranberries, or other dried fruit (or a combo)
  • 2 tbsp hemp or other seeds
  • 1/4 cup raw cacao nibs (or chocolate pieces)
  • 2 cups rolled (old-fashioned) oats
  • 2 cups toasted rice cereal (like Rice Krispies, I use the Barbara's brand brown rice version)
  • 1/2 cup nut or seed butter (I like almond)
  • 1/2 cup brown rice syrup
  • 1 tbsp pure maple syrup
  • 1 tsp vanilla
  1. Combine the first seven ingredients (almonds through rice cereal) in a large bowl and set aside.
  2. Combine the nut butter, rice syrup, maple syrup, and vanilla in a microwave safe bowl. Warm in the microwave until pourable. Pour over the dry ingredients and mix until well combined.
  3. Firmly press the mixture into a 9x13 inch pan lined with parchment paper and put in the freezer. When cooled and hardened, remove from the pan by lifting it out by the parchment paper and place on a cutting board. Cut into bars and individually wrap.
For 12 bars: 287 calories, 9g protein, 16g fat, 37g carbohydrates, 15g sugar
Share
Tweet
Pin
Share
7 comments
Older Posts

About me

About Me

My name is Allison. I am a writer, boy mom, and a nature lover in Northern California. Read more here.

Blog Archive

  • ▼  2020 (1)
    • ▼  March 2020 (1)
      • That Time the World Ran Out of Toilet Paper
  • ►  2018 (3)
    • ►  November 2018 (1)
    • ►  October 2018 (1)
    • ►  September 2018 (1)
  • ►  2016 (1)
    • ►  April 2016 (1)
  • ►  2014 (12)
    • ►  April 2014 (1)
    • ►  March 2014 (1)
    • ►  February 2014 (5)
    • ►  January 2014 (5)
  • ►  2013 (62)
    • ►  December 2013 (6)
    • ►  November 2013 (32)
    • ►  August 2013 (4)
    • ►  July 2013 (7)
    • ►  June 2013 (8)
    • ►  February 2013 (1)
    • ►  January 2013 (4)
  • ►  2012 (19)
    • ►  December 2012 (1)
    • ►  September 2012 (1)
    • ►  August 2012 (1)
    • ►  July 2012 (1)
    • ►  June 2012 (3)
    • ►  April 2012 (2)
    • ►  March 2012 (3)
    • ►  February 2012 (2)
    • ►  January 2012 (5)
  • ►  2011 (63)
    • ►  December 2011 (3)
    • ►  November 2011 (6)
    • ►  October 2011 (4)
    • ►  September 2011 (3)
    • ►  August 2011 (4)
    • ►  July 2011 (6)
    • ►  June 2011 (5)
    • ►  May 2011 (4)
    • ►  April 2011 (4)
    • ►  March 2011 (9)
    • ►  February 2011 (10)
    • ►  January 2011 (5)
  • ►  2010 (120)
    • ►  December 2010 (6)
    • ►  November 2010 (7)
    • ►  October 2010 (11)
    • ►  September 2010 (11)
    • ►  August 2010 (9)
    • ►  July 2010 (16)
    • ►  June 2010 (11)
    • ►  May 2010 (12)
    • ►  April 2010 (6)
    • ►  March 2010 (12)
    • ►  February 2010 (9)
    • ►  January 2010 (10)
  • ►  2009 (13)
    • ►  December 2009 (9)
    • ►  November 2009 (4)

Created with by ThemeXpose